Prepare to send the electronic invoices (e-invoices)
An electronic invoice is a document created upon the completion of a sale transaction between the financier and other financiers B2B (Companies of all types, whether joint-stock, limited liability, or others...) and is sent to the Egyptian Tax Authority (ETA).
In order to start using a template for working with electronic invoices (e-invoices), you must do the following:
- Register your Pulsar system on the Egyptian Tax Authority (ETA) website.
- Enable the special (plugin) program, which will help you to sign your electronic invoices (e-invoices) with the electronic signature. Turning on the plugin for sending an electronic invoice (e-invoice) is like turning on the light in a room.
- Connecting the electronic signature to sign an electronic invoice (e-invoice) is like adding your signature on paper, but in a digital format.
And remember: When exchanging information with the Egyptian Tax Authority (ETA), always use an electronic signature and activate the plugin.
Register your Pulsar system on the ETA portal to send the electronic invoices (e-invoices)
- Go to your company profile on the ETA website by clicking on View Taxpayer Profile. This is how to open your company page
- Go to the Representatives section and click on ERP Registration. This is how to go to the section containing information about your representatives, then click on the ERP Registration button.
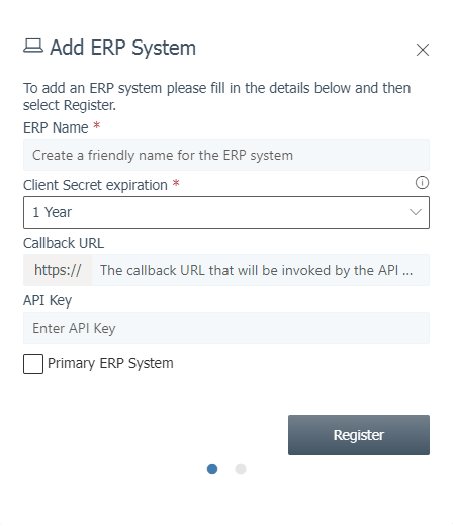
- When the ERP system registration window appears, enter the name of your accounting system in the ERP Name field. For example, if your system is called Pulsar ERP, enter that name. Leave the remaining fields blank and click the Register button. This is how to type the name of your system, then click the Save button.
4. Once you register your ERP system on the ETA website, you will be given the specific details you need to send electronic invoices. This data includes:
• Client ID
• Client Secret 1 (Secret Key 1)
• Client Secret 2 (Secret Key 2)
5. Copy this data as if you were copying a text onto a paper.
6. Open the Integration with ETA tab in your Pulsar account.
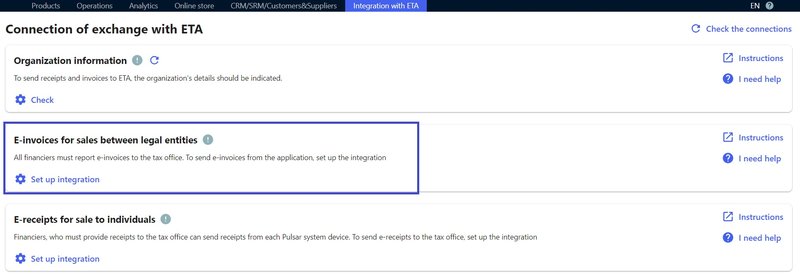
7. Find the section called E-invoices for sales between legal entities. Click on the Set Up Integration button, then below point 3 click on the pencil icon, which looks like a drawing pen.

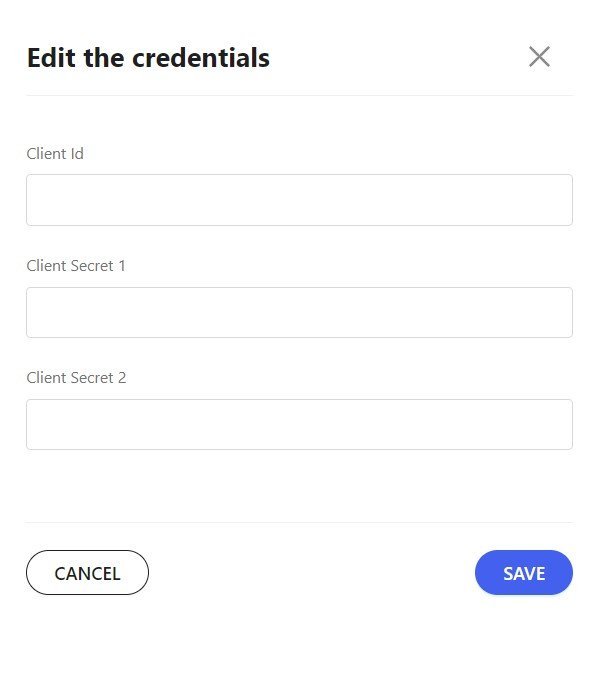
When the window will be opened, enter the credentials you copied from the ETA portal. After that, save the changes by clicking the Save button.
After saving the data, the system will verify. If the data has been entered correctly, you will see a green indicator which is indicating that everything is fine. This serves as an indication that you did everything right.

If the data is entered incorrectly, the indicator will appear red. In this case, go back and repeat step 7, and make sure that the data entered is correct.
Activate the plugin
Plugin helps you to electronically sign the electronic invoices (e-invoices) created in your accounting system (ERP) for your point of sale (store).
- To start using the plugin, first download it from the link in the Integration with ETA – Connection tab in the E-invoices for sales between legal entities section under point 4.

2. After downloading, unzip the plugin folder on your computer and move it to your desktop (this is a place on your screen where shortcuts are usually located).
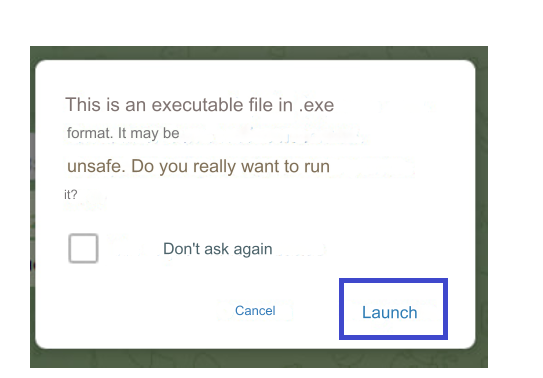
3. Next, from your desktop, find the file named “eta_crypto_plugin.exe” and double-click it with your mouse. This will launch the plugin and allow you to use it to sign the electronic invoices (e-invoices).

4. Confirm the operation.
5. Hide the plugin using the HIDE PLUGIN button.
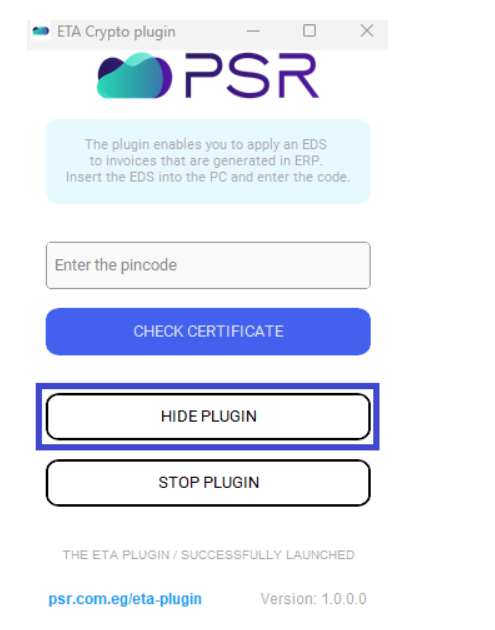
6. The plugin is now ready to use for signing the electronic invoices (e-invoices). You can see its icon in the taskbar (computer control panel) in the lower right corner of the screen.

important note! Every time you send the electronic invoices (e-invoices) to the ETA, don't forget to turn on the plugin.
When you will finish sending invoices, you can disable the plugin. To do this, simply click on the plugin icon in the taskbar (in your computer's Control Panel) and click on the STOP PLUGIN button.
The plugin also allows you to verify the authenticity of the electronic signature you have entered into your computer. To do this, you will need to enter the PIN code of the electronic signature in a special field and click the Check Certificate button. Then you will know who this electronic signature was issued to.
Connecting an electronic signature
To send the electronic invoices (e-invoices) to ETA, it is important to use an electronic signature. If you don't have it, you can get it from ETA.
- First, insert this electronic signature into your computer.
- Next, on the Integration with ETA-Connection tab in the E-invoices for sales between legal entities
section, then under the point 5, click on the pencil icon that resembles a drawing pen. This will allow you to set up the use of an electronic signature when sending the electronic invoices (e-invoices).

3. When the window appears, enter your electronic signature PIN.
To remember! Every time you want to send the electronic invoices (e-invoices) to ETA, be sure to enter your electronic signature into the computer.
