Accounting write-off of products “Write-Off”
The main reason for removing a product from the point of sale (store) is the sale operation, but sometimes products are removed due to exchange, damage, use for personal needs or due to theft. To make your point of sale (store) balances match real balances, we recommend documenting product removals using the write-off operation.
You can also learn about how to write off products by the Pulsar POS device.
Creating the operation
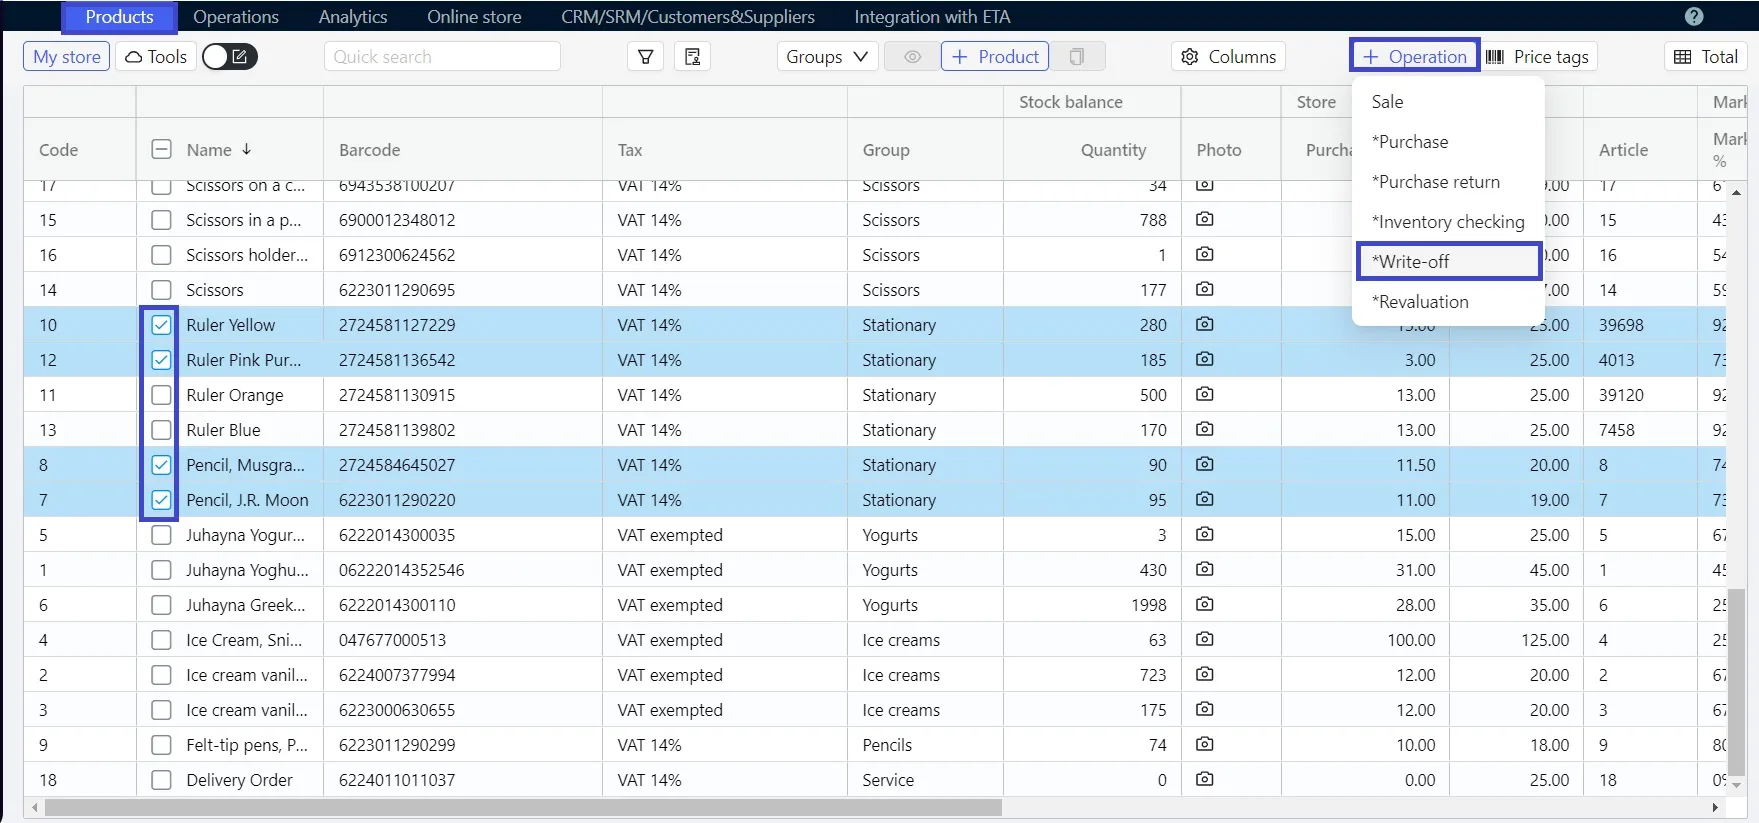
- Go to the Products tab.
- Select one or more products that you want to write off. If you want to select all items - check the Name box in the column header.
- You can use filters or group selection to select the products group.
- Click + Operation on the top menu.
- From the drop-down list, select Write-off.
Selected products will be added to the tabular part of the operation.
The tabular part
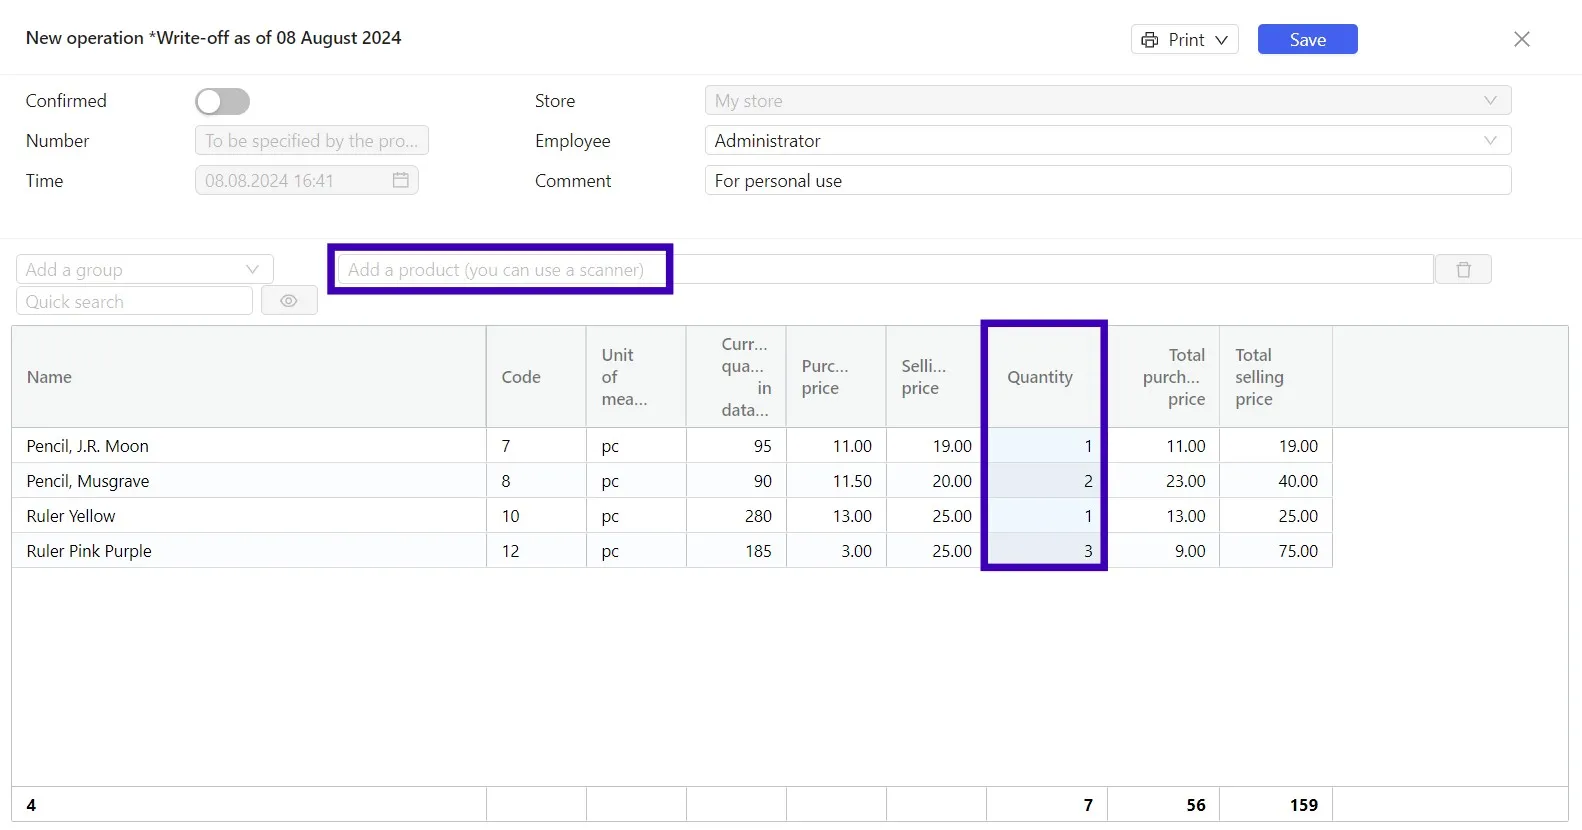
- Set the quantity of products to be written off. This can be done manually or by scanning the barcode several times, each reading will add +1 to the quantity.
- If you want to add products to the operation for write-off, use the line of the selected product or use a scanner: put the mouse pointer in the line of the selected product and scan the barcode.
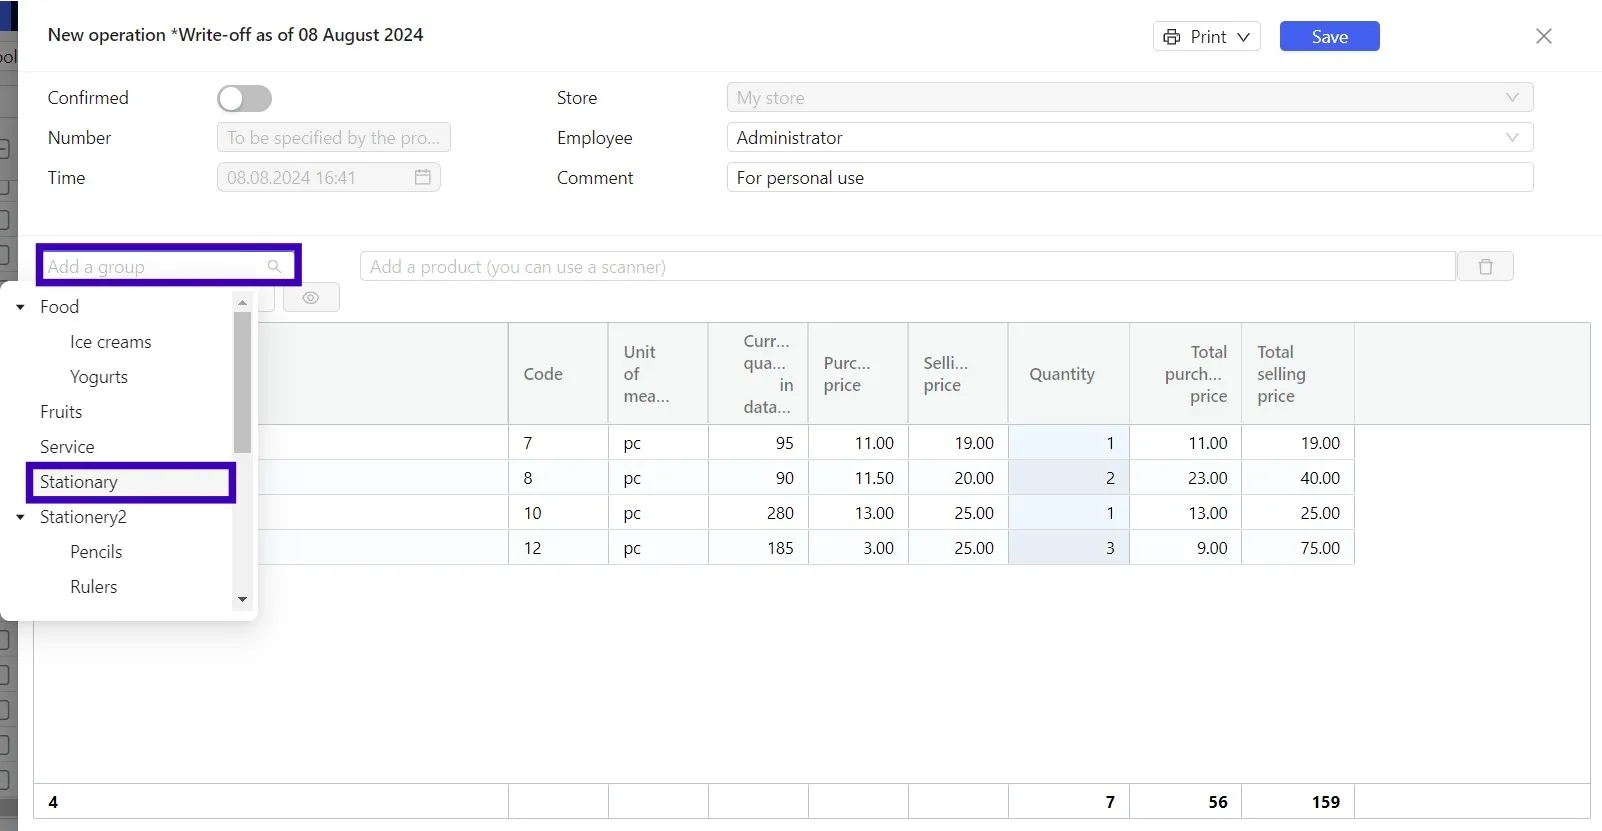
- You can also add products groups to the write-off operation:
select one or more groups from the drop-down list on the left side of the line of the selected product and еnter the quantity of items which need to b written-off for each product.
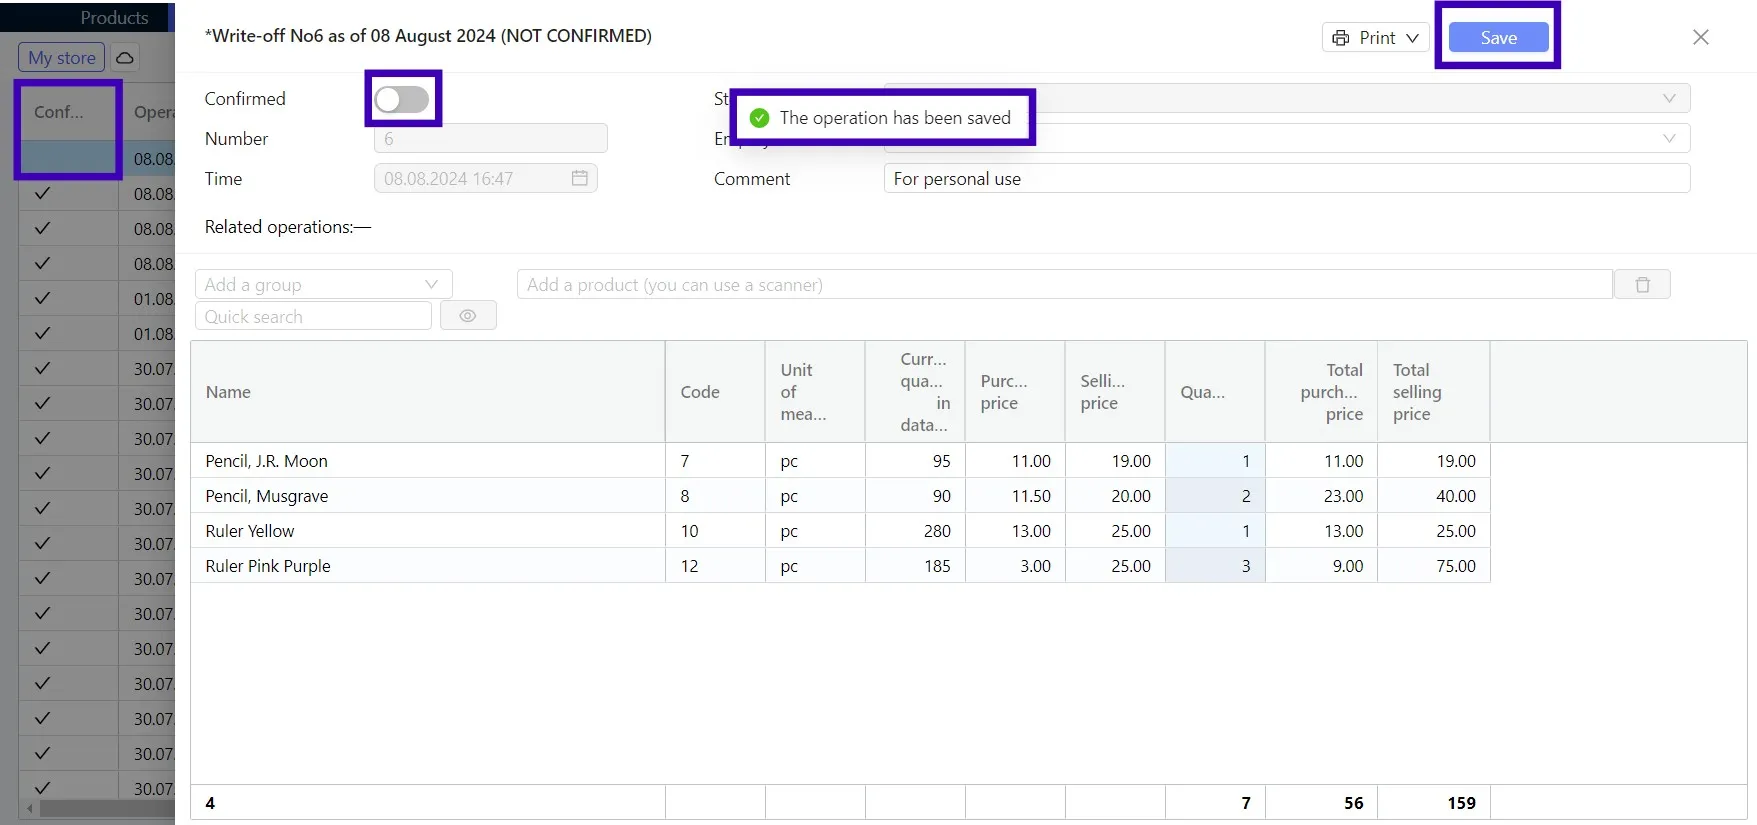
Save the operation
After completing the tabular part, make sure that the total quantity matches the products quantity that has been written off.
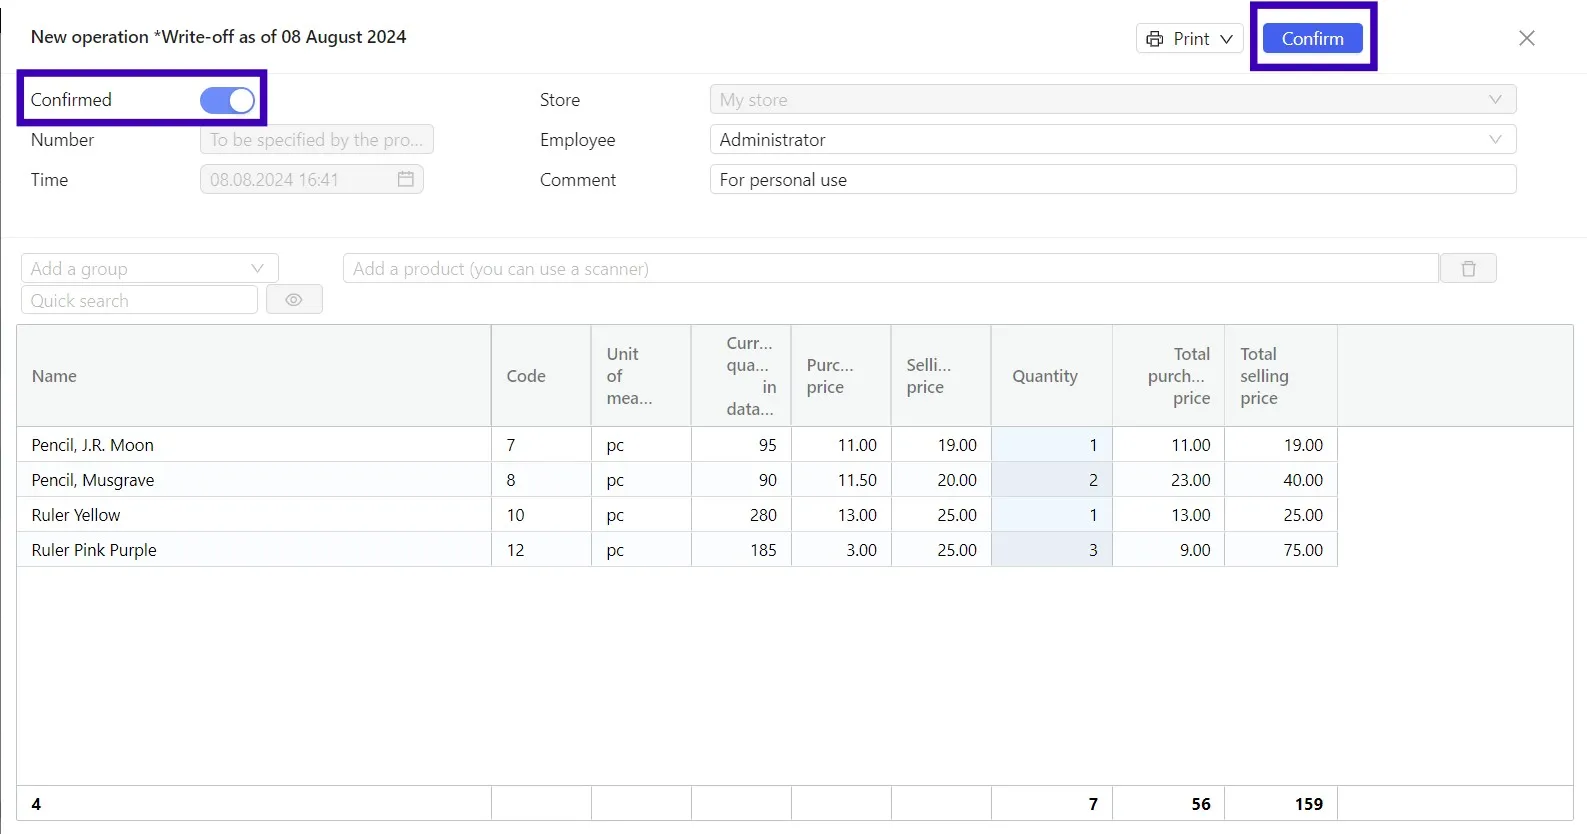
- Check that all fields of the operation are completed, then activate the Confirmed slider in the upper left corner of the operation header and click Confirm.
The quantity data will be updated in the cloud after the operation is executed.
- If you haven't finished working with the operation yet, save it as a draft. You don't need to activate the Confirmed slider in this case.
- You can find the saved draft in the Operations → Inventory control. Double-click to open the draft and continue working with it.
The difference between a draft and an executed operation is that there is no checkbox next to the draft operation in the Confirmed column.
Please note! the operation cannot be edited once it has been executed.
When working with large operations, we recommend periodically saving drafts.

