Online Store Creation
The online interface for your point of sale (store) will allow customers to place orders without leaving home, which is especially important in the context of rapidly developing online sales.
Learn more about creating an online store:
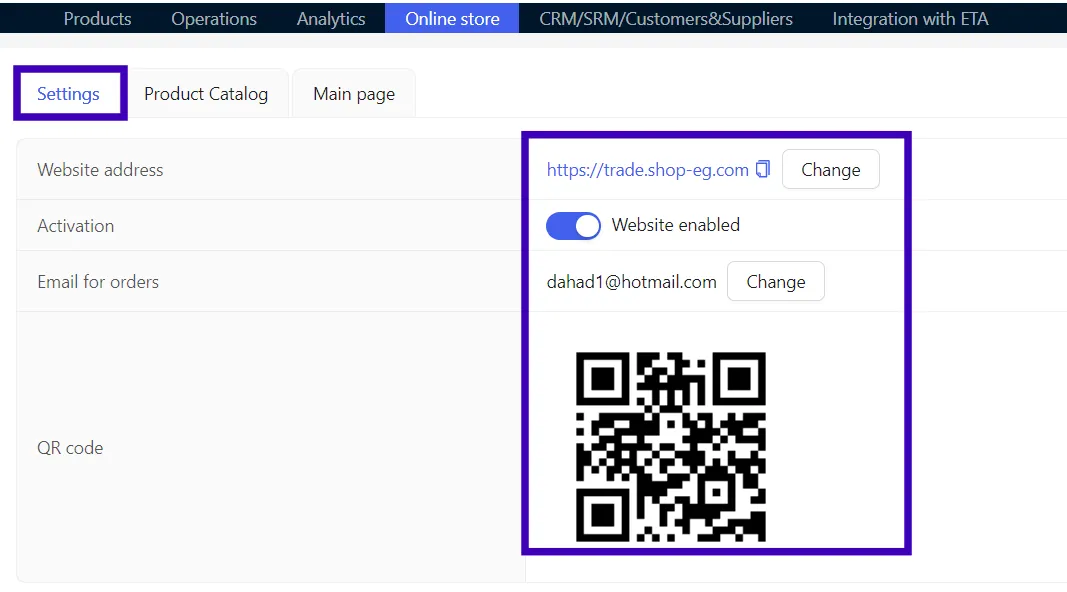
Step 1. Settings
Online store name (website address). Start creating an online interface for your point of sale (store) from the website address. Only Latin letters and numbers can be used for the name. The name of your online interface for your point of sale (store) will be created in the format ХХХ.SHOP-EG.COM, where XXX is the unique name of your point of sale (store).
Do not use complex names that are hard to comprehend.
Email for receiving orders. Specify the email to which orders from buyers will be sent. Сheck the correctness of the specified address carefully. If the address is specified incorrectly, you will not see the order. Click Save.
QR code. Generated automatically. It can be used for advertising booklets and other promotional tools. By scanning the QR code, the buyer will be taken to the page of your online store.
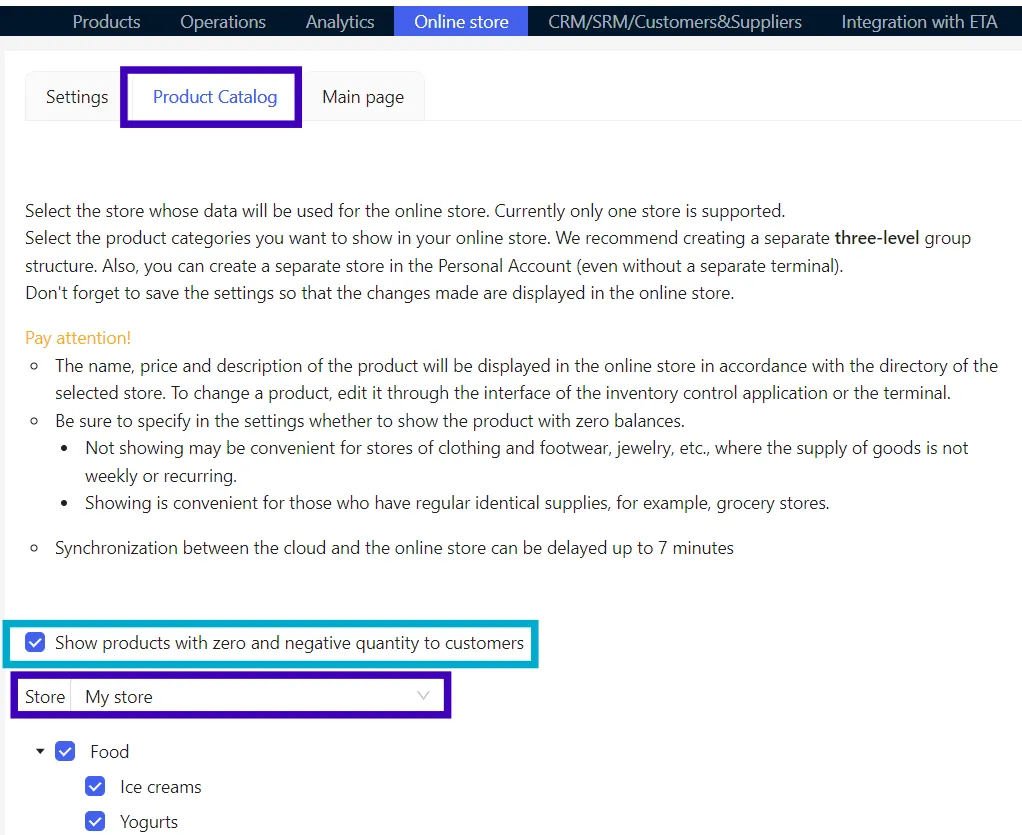
Step 2. Products catalog
For the online store, products from the product groups that selected by you will be used. The buyer will see the following information about the product: name, description (if filled in), price, units of measure and code. photos.
To change the name, description or product group, use the web interface of the inventory control application or the Pulsar mobile application. Updates will appear on the online store with a delay of several minutes.
Go to the Products catalog tab.
Specify whether it is needed to show products with zero quantity.
Store. From the drop-down menu, select your point of sale (store) whose nomenclature will be used for the online store. Currently, only one store is supported.
Product groups. Select the checkboxes for the groups of products that you want to show in the online store.
Don't forget to save your settings so that your changes will be reflected in the online store.
Don't add too many products to your online store. It is difficult for the buyer to orient himself within a large number of items.
Step 3. Making the Main Page
The main page of the online store gives the buyer an idea of what can be bought in your point of sale (store) and how it can be done. How to place an order and pay for it, how to find out the terms of delivery and pickup.
We recommend posting the following information: cover photo, name and a short description of your point of sale (store), methods of ordering, delivery and payment for goods, as well as store contacts.
To fill the page, you can create your own template or use a ready-made version. Extra fields in the template can be deleted, and missing ones can be added.
To add a block for a photo, title or image, press Enter or Tab and expand the + on the left side of the constructor. When you hover the mouse over the icons, tooltips pop up. Select the one you need depending on what you want to add: an image, a title or a text.
Divide the complete text into sections using Enter and a spacebar. This will make it easier for the buyer to perceive the information.
Please remember to save the entered information so that it appears on the online interface for point of sale (store). To preview how your store will look, you can open the link with your website's address.

Online Store Promotion
An equally important step is the promotion of the online store. Creating the online store itself will not attract a buyer with an order. Even if your point of sale (store) has regular customers, they need to be informed that they can now place orders by phone or through the online store basket. For this, any standard methods are suitable, for example:
- Place the information and the QR code on the door of the point of sale (store) or near the cash register;
- Print booklets with information about the point of sale (store) and products, the ability to place an order from the comfort of the buyer’s home, and distribute the booklets in your area. Be sure to place the QR code on the booklet by copying it from the Settings page. By scanning the code, the buyer will enter the online store of your store;
- If you have a base of regular customers, you can distribute newsletters by attaching a link to the online store in a letter or SMS;
- Publish informational posts on social networks, place a link to the online store or the QR code on your pages;
- Place information about the possibility of making an order online and a link to the point of sale (store) on local public pages and in local communities.